
Dr. Gaslands – Or How To Stop Worrying and Convert Some Cars (Part 1)
Mad Max. With Hotwheels.
Yes. You heard me right. Mad Max with mother lovin Hotwheels. That’s the essential concept behind Osprey Games Gaslands Refuelled, a game where the first and most important rule is the “Rule of Carnage” (literally, it is the first rule in the rulebook) that states when in doubt, do the thing that causes the most carnage.
That could well be good advice for life generally, but it’s an essential commandment for the world of Gaslands.
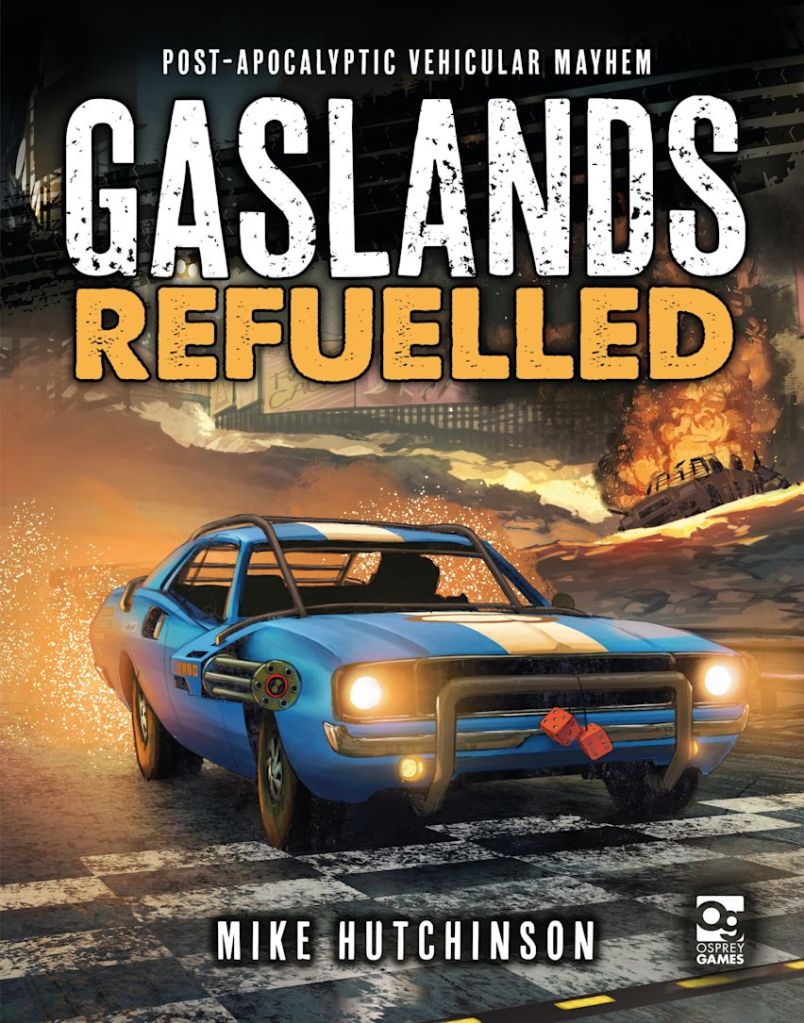
I won’t bore you with a review, the game has been around for ages, is brilliant and has an absurdly low buy in – £20-£25 quid for the rulebook, half a dozen six sided dice, photocopied templates out of the back of the book and a handful of hotwheels/matchbox/other brands of box scale cars are available cars are enough to get you started. Just be warned that you will spend the rest of your life stalking charity shops, ebay and carboot sales for cheap beat up toy cars to run through the post apocalyptic chop shop (not to be confused with the post apocalyptic chip shop).
It’s a great game, well worth your money, but that’s not the point of this post. The point of this post is to share my tips on taking run of the mill toy cars and turning them into the post apocalyptic killing machines of the (worryingly near) future!
But where to start when you are a budding wasteland warlord, looking to assemble your savage tribe of desert petrolheads to wreak havoc?
Raw Materials
Personally, I’m a fan of scouring charity shops for beat up old second hand cars. One of my local shops does bags of half a dozen cars for a couple of quid. Sure, they’re usually in horrible condition, but you’re looking for post apocalyptic killing machines so that shouldn’t be a problem. And don’t get too hung up on the make and model of the actual cars. Sure, certain cars lend themselves to certain builds, but remember – even the most basic Ford Fiesta commands respect when fitted with twin linked mini guns!
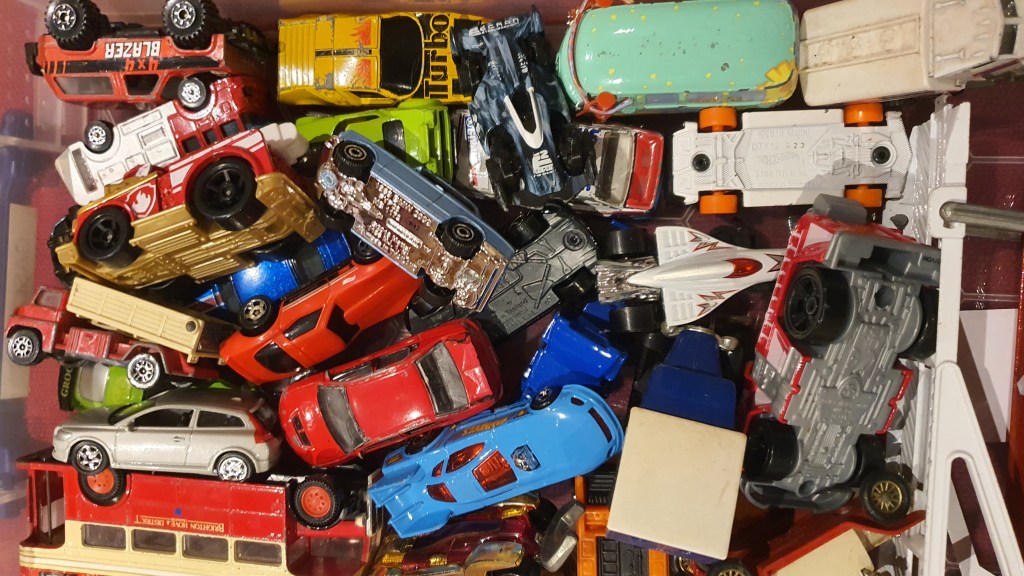
The other thing you will need is a plentiful supply of bits to turn those humdrum automobiles into fullautodeathmobiles. Now if you are any kind of a hobbyist, it’s likely you will have a bulging bits box (ooh matron) of spare parts from other model kits but don’t be alarmed if you don’t. Weapons and armour can be scratch built from all manner of household objects and you can buy plastic sprues of components. Or why not take advantage of the age of the 3D printer to print your own or buy from various online retailers? Personally I am a fan of the Implements of Carnage sprues available from North Star Military Figures. Whatever your approach, you will definitely need SOMETHING to make those cars shine.
Once you’ve got your car to work on and some bits to stick on it comes your first decision – do you just cobble together your car and give it a paint, or do you do a full strip down and reconstruction job?
To Strip Or Not To Strip
Let’s get some stuff straight from the start. I am a fierce opponent of the concept of WYSIWYG (What You See Is What You Get) models. I’m anti most rulesets that advocate it and I think it’s just dumb/capitalist nonsense at its best. I’d much rather have a bunch of representative models that I can use in different circumstances and therefore get the best value for money.
Not everyone would agree with that and to that I say fine, you do you. But can you really be bothered modelling every possible variation of a model so you can play a game WYSIWYG?
Thankfully Gaslands does not stipulate WYSIWYG within the rules (I’d have just ignored it if it did to be fair) so what you should really be thinking about is what is going to look cool/distinctive/thematically appropriate on the gaming table. Get a sense of what you are looking to achieve before you start – do you want some showroom ready, knowing film reference, sleek looking vehicle or are you aiming for that crusty post apocalypse rust bucket look?
This is quite an important question, because it may influence your decision as to whether you do a quick and dirty conversion and paint job, or whether you would rather take the time and effort to fully strip down a car and give it a clean finish. Personally, I am more of a strip the cars down, remove the original paint and do a full reconstruction kind of guy but that’s because I’m a nerd.
There is no right or wrong way, but there are advantages and disadvantages to the different approaches. In these “how to” guides I will demonstrate both.
I will use this monstrosity of a base vehicle for the “quick and dirty” approach.
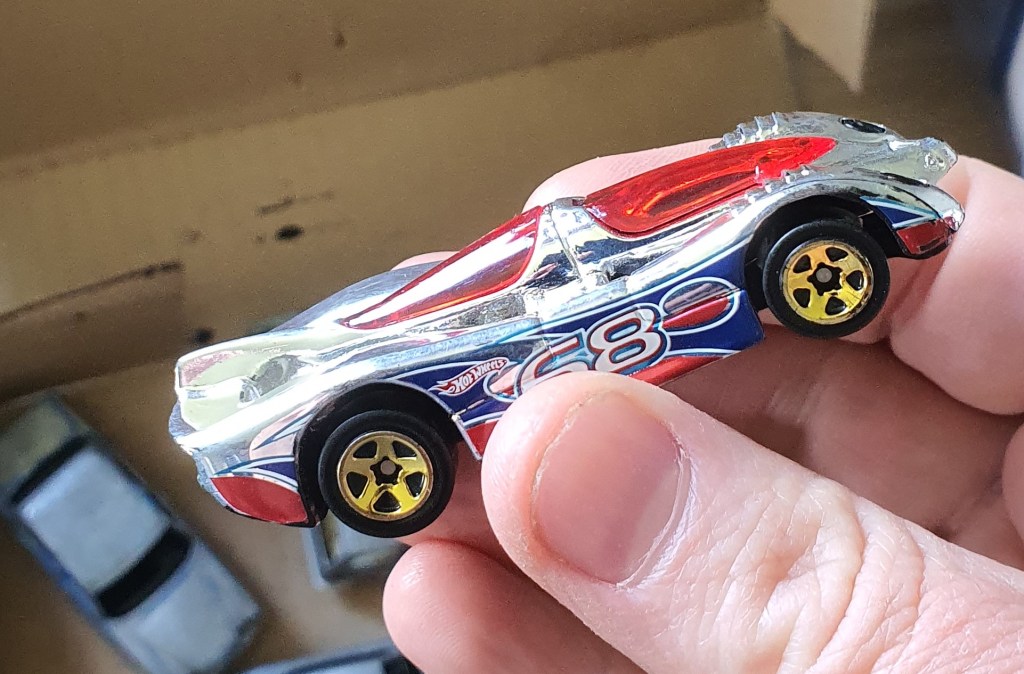
This disgusting specimen came in a bag of charity shop specials and is a perfect example of poor design. Garish, impractical. It nearly went in the bin until I thought of doing this how to. In game terms, a care like this would probably fit the Performance Car category and I will be painting it in a generic post-apocalypse-rust bucket style.
This car will receive zero preparation before being converted and painted, other than to superglue the wheels in place. This is important, as it stops the car changing position whilst in play on the board. Some people go a step further and stick the cars on a rectangular base, but personally this feels like overkill to me.
Number 68 here is going to be the example of the shortest pathway from purchase to play. Will it work out? Who knows, all I know is, it’s one of the worst vehicles in my bits box so I don’t mind sacrificing it to the gamer gods for the purposes of this demonstration! I have my doubts about how the super shiny finish will react to glue and paint but I am prepared to give it a whirl in the name of science!
I don’t have a photograph of the car I will be using for the full strip down/rebuild example because I did a batch of cars recently and hadn’t at the time considered writing about it. The vehicle I will be using for this is this one:
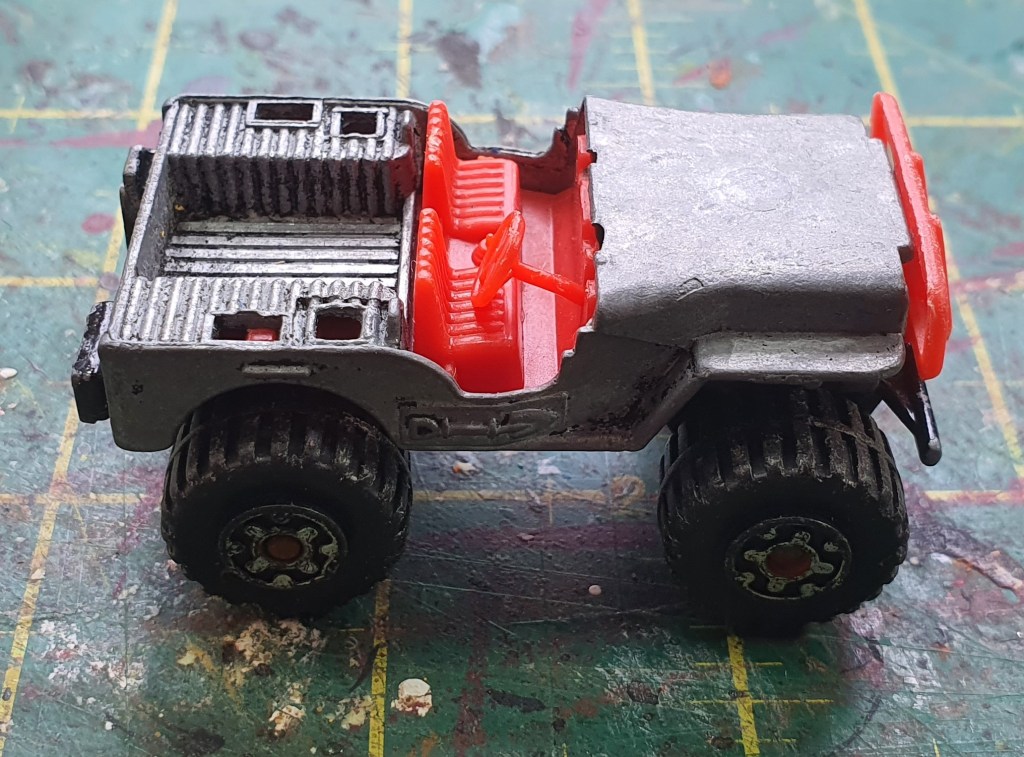
This chonky wheeled jeep will become a buggy I think, and will need some crew due to its open topped nature. It’s going to take more modelling as I’ll need to add a roll cage and other details to make it a serviceable vehicle for Gaslands, unlike Number 68 above which will be getting the least possible amount of work done to it! I’ll be theming it in a moonshiner style to match in with another car in my collection to form the basis of a team (more on this later).
So these are our two candidates. The prep for Number 69 is complete, I’m not even going to lightly sand it to key the surface to help paint adhere, I’m that much of a rebel. We shall see if I live to regret that decision. The buggy has had the initial prep done already, but I’ll talk you through it regardless.
Drill Baby, Drill
Depending on the brand (or lack thereof) of car you are using you will find they are generally made up of three separate components, held together by rivets or, occasionally, screws. If you flip your chosen car over you will find these are accessible from the underside of the car.
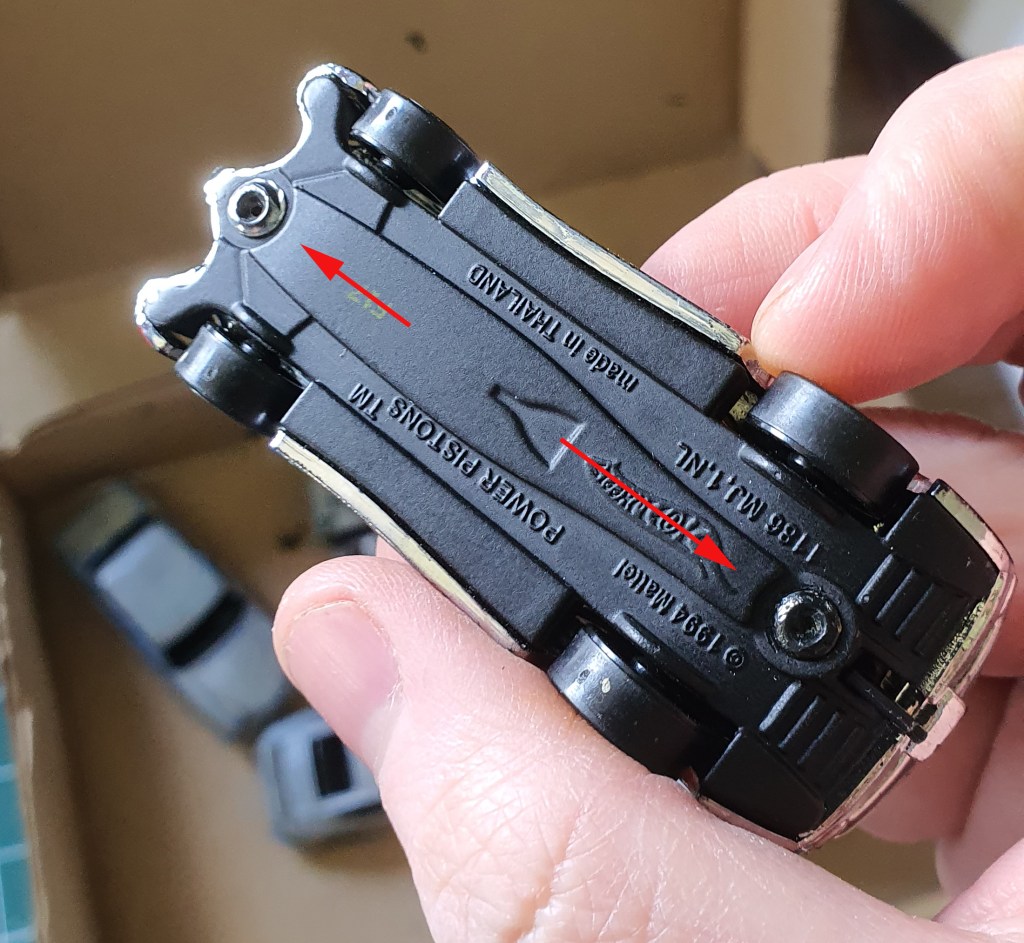
If you have one of the few cars I have seen that have screws instead of rivets, then it’s simply a case of unscrewing them and you should be able to disassemble the car. If, as pictured, it’s got rivets then you need to take a drill with a suitable bit and drill them out. Ideally you want to clamp the car securely in a vice and use a bit the diameter of the head of the rivet. They should drill out quite easily, but you’re going to want to be careful not to slip and either injure yourself or damage other areas of the car (the underside is not really an issue as it won’t be seen during play, but try not to drill deeper than you need to to get rid of the rivet head).
If this procedure is successful the car should easily pull apart into its various sections.
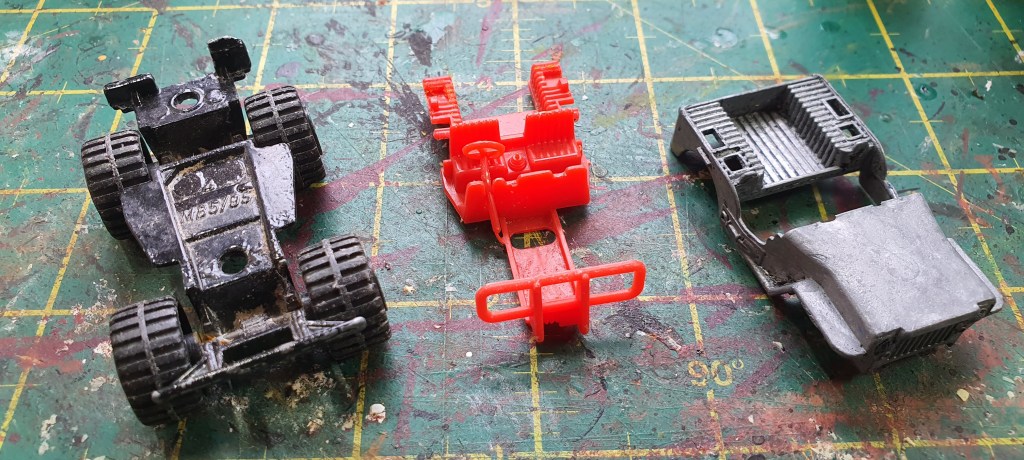
Once you’ve done that, you should have something like this – the chassis (metal on better quality cars, but occasionally plastic), an interior panel (usually plastic) and the body (usually metal). If you have a vehicle with windows, these are usually a one piece plastic insert that sits between the interior and the body.
When I took this one apart, I took the body and submerged it for a couple of days in paint stripper to remove all of the original paint. Stripping the paint has a number of advantages, chief among them being the bare metal surface will accept glue and paint more readily than the painted one. It was also pretty chipped and beaten up, so I’ll get a smoother finish having stripped all that old paint off. The interior and chassis will not need to be stripped – the plastic will take paint readily enough and you won’t see 90% of the chassis, and a lot of the chemicals you can use to strip paint can also melt plastic, so it’s not worth the risk when there’s no actual benefit.
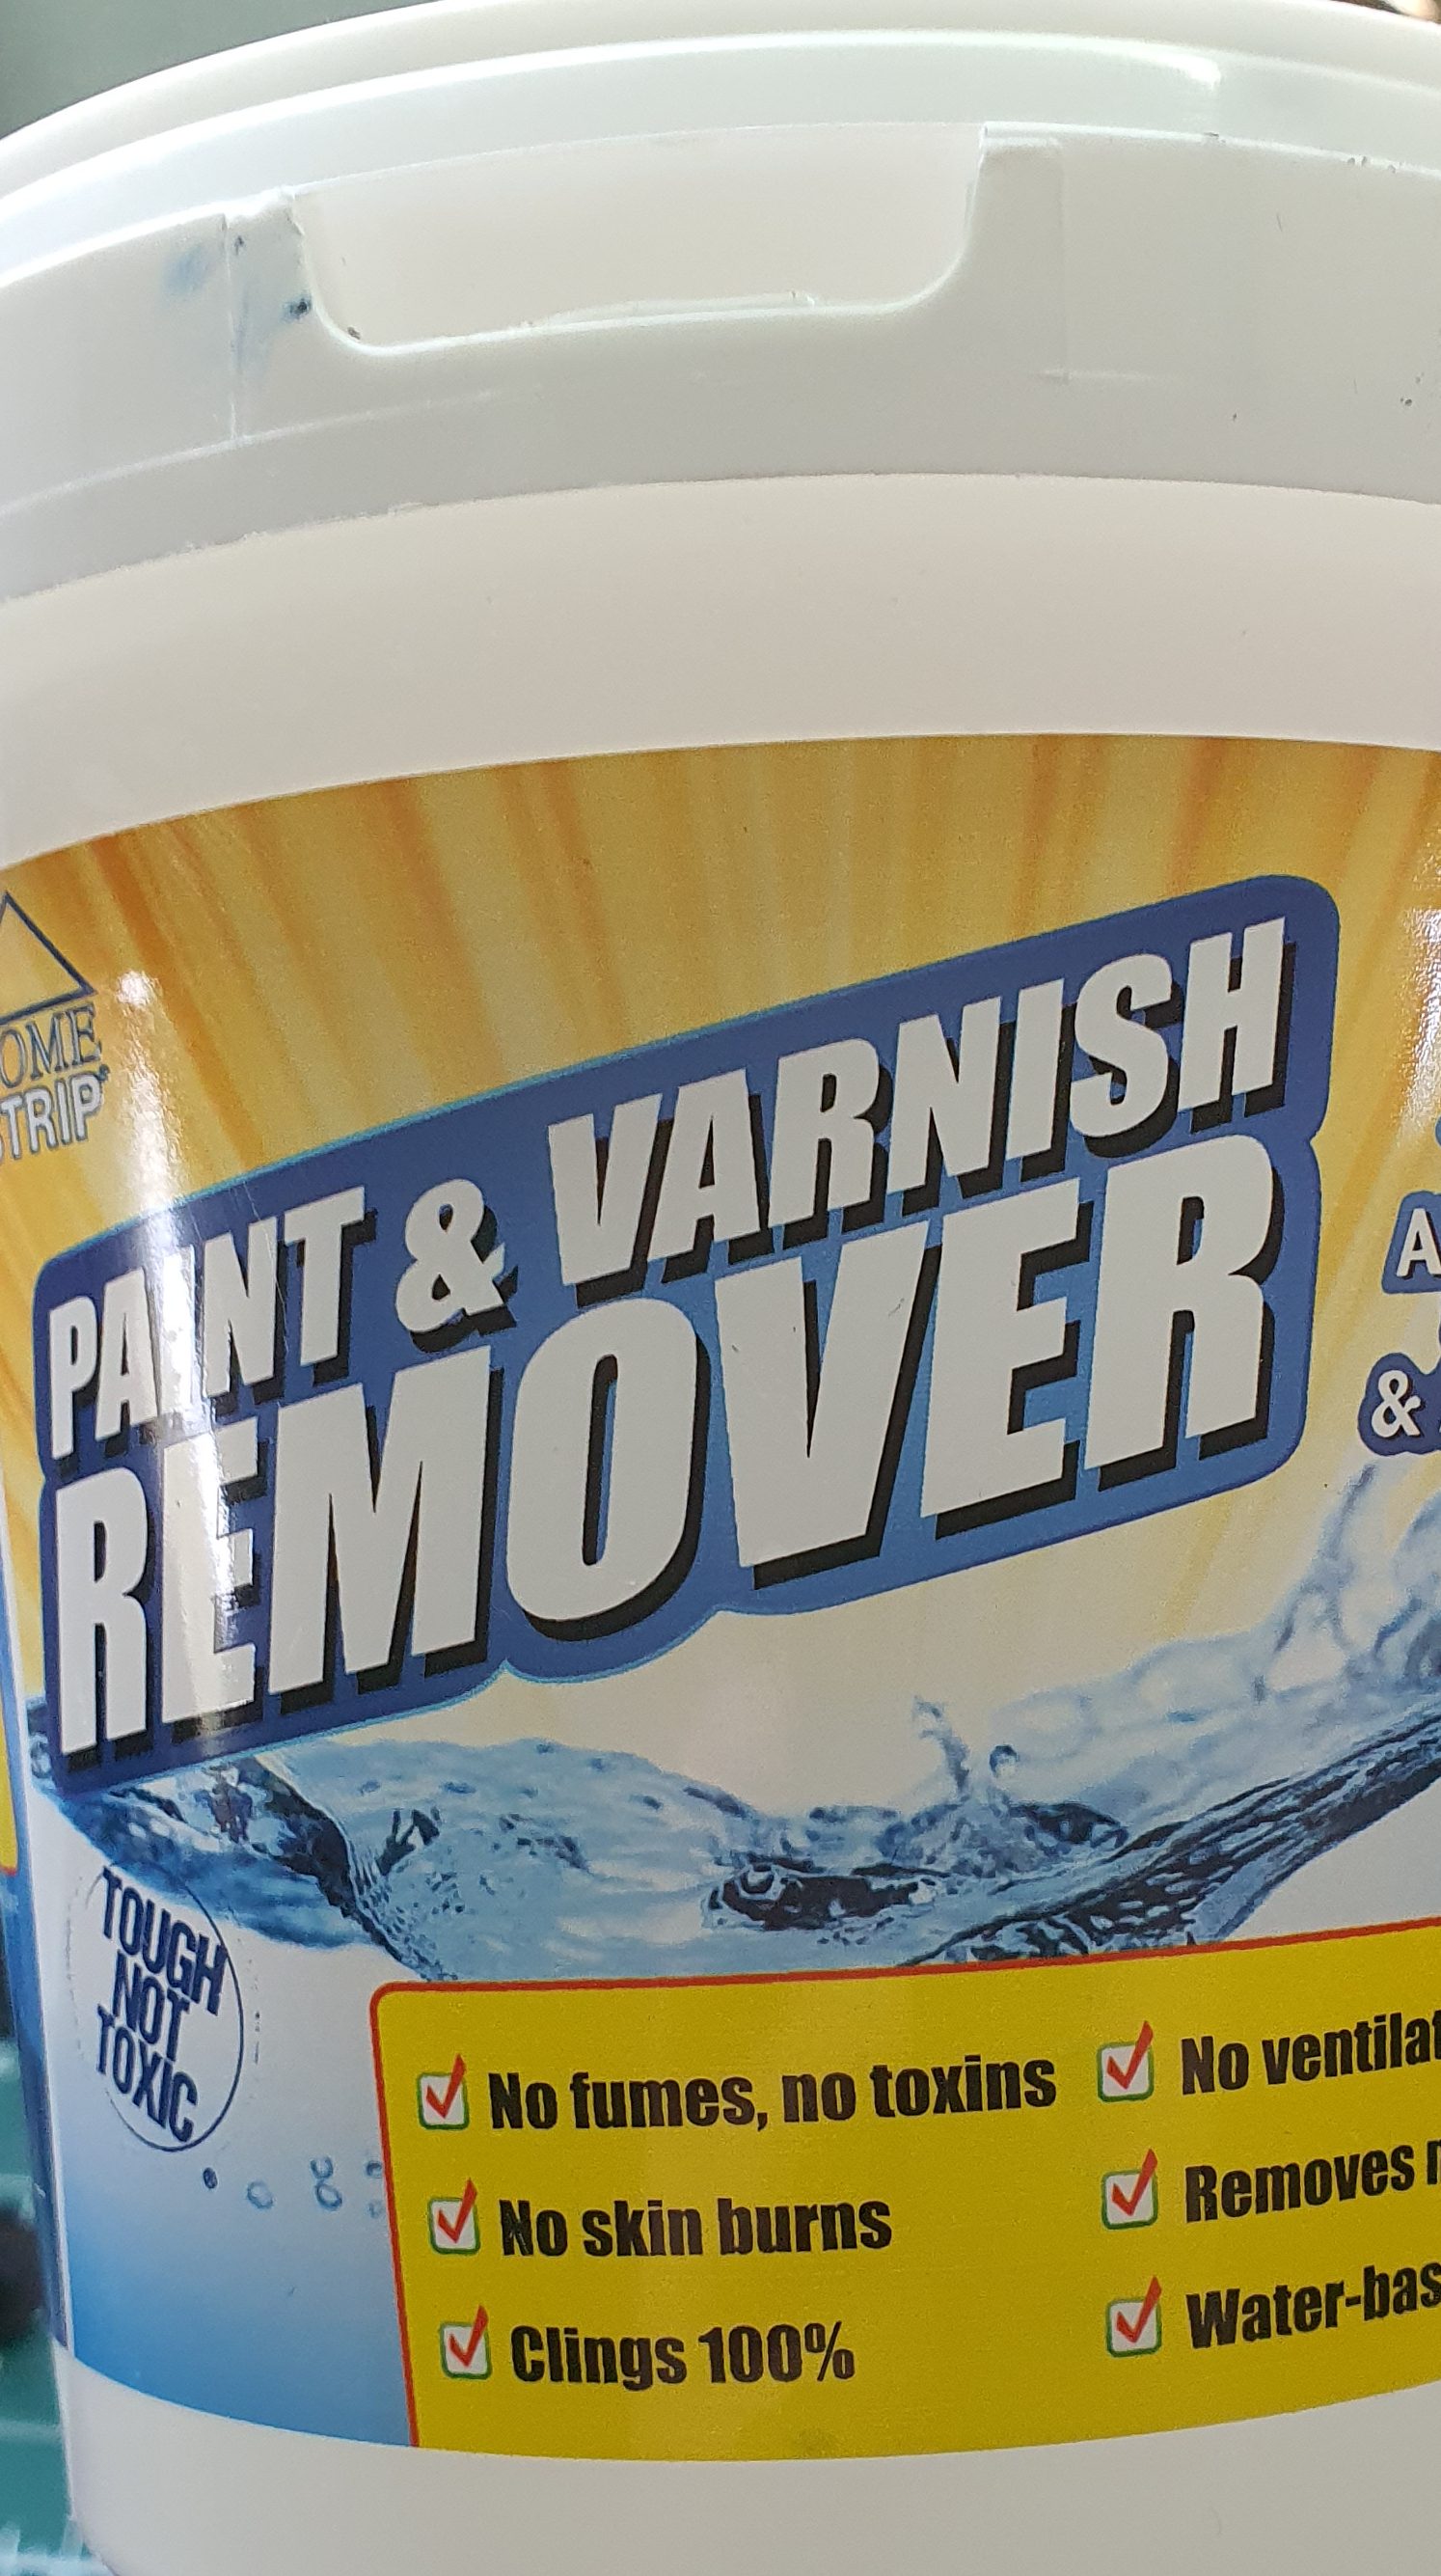
You can use a few different things to take the paint off. I have used nail polish remover in the past but prefer to use something like this which is an odourless, water based paint stripper. This has the massive advantage of being able to be used indoors without stinking out the entire room/house and is much safer to use than other harsher chemical alternatives. Whatever you choose to use, please read the labels thoroughly and take any necessary precautions such as hand, eye and respiratory protection! Gaslands is a good game but it’s not blindness or chronic lung problem good.
You might need some trial and error to get all of the paint off with your chosen stripping agent. I find older cars, especially where the paint is in poor condition, are quick and easy to clean up while brand new casts with shiny lacquer may take longer, or a couple of sessions in the paint stripper to get fully cleared (I would imagine roughing up the lacquer with sand paper might accelerate the process).
Once it has rested in the paint stripper for a while, a quick scrub with an old toothbrush should slough the old paint off quite easily, although you might need something with a bit more grunt like wire wool or a wire brush if there are stubborn bits. I sometimes find that some paint in tiny crevices and details can prove hard to remove and really doesn’t matter too much, unless you are a perfectionist you can just leave it. The aim is to be left with a metal car body with as little old paint left on it as possible.
The last thing you need to consider at this stage is if you plan on adding crew to the vehicle or not. It is absolutely NOT essential to add crew to the cars, but it’ll look a bit odd if you have a car like the buggy where the interior of the car is visible if you leave it empty.
Where you have a “standard” car design with windows you can either leave the original windows in and paint them (tinted windows are a thing after all) or cover them with grills, armour plating or other details to obscure the interior from view.
If you do decide you want some crew, the box scale of Matchbox and Hotwheels cars is roughly equivalent to 20mm/1:72 scale/00 gauge railway scale and so figures in this size bracket should do the job. Again, Gaslands specific figures are available from various retailers in physical and STL format. I get mine from North Star Military Figures who do a range of figures themed to the team sponsors in the book. The scale of the cars is not consistent – they are designed to fit in a standard box so larger vehicles will actually be to a different scale to smaller vehicles, so you may find the vehicle does not really align with the scales I mentioned above. I find with these (things like hum vees and armoured cars) the beset approach is to conceal any view into the crew compartment.
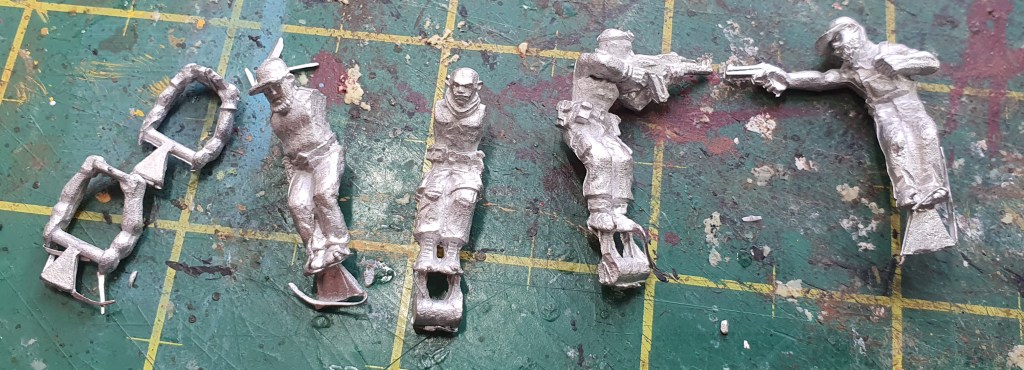
If you’ve done all this right, you should now be looking at a car broken down into its component parts, with a bare metal body, a handful of bits and bobs and greeblies from your bits box to turn the humdrum car into an apocalyptic death machine and maybe one or more crew member to drive it into battle.
And that concludes Part 1 of this guide. Join me in Part 2 where we will take these raw materials and forge them into something awesome!

Leave a reply to Gaslands 2 – The Road Warrior – The Born Again Board Gamer Cancel reply